Tuesday, July 1, 2025

Regkey of the month: JULY

It's already the third episode and summer is coming, so we're generous and bring you a combo of 2 interesting regkeys for Veeam Backup and Replication.

VTHScanEmail & VTHScanExclusions


In case you didn't know: VTH stands for Veeam's Threat Hunter technology.

Why Your Backups Need a Threat Hunter (and why Veeam Delivers) 

In today’s cyber battleground, relying solely on production environment security is like wearing half a suit of armor. Existing tools might miss stealthy threats, third-party scanners drain budgets and resources, and performance bottlenecks slow critical recoveries. 

Let's look at VTH: a zero-cost, zero-install second opinion embedded directly in Veeam’s SureBackup, Backup Scan, and Secure Restore workflows. No extra licenses needed. No complex deployments. Just pure, surgical malware hunting !


But what if you need granular control over what gets scanned? 

That’s where the registry keys VTHScanEmail and VTHScanExclusions come in to play. 

VTHScanEmail: The Email Scanning Power Switch 

  • Key Path: `HKLM\SOFTWARE\Veeam\Veeam Threat Hunter\`  
  • Value Type: DWORD  
  • Default State: `1` (Enabled)  


What It Do ?

 When enabled (value `1`), Veeam Threat Hunter will scan:  

  • Plaintext emails (e.g., .EML, .MSG)  
  • Email databases (PST, OST, MBX, DBZ, etc.)  

A Trade-Off: 
 

Scanning complex email structures isn’t lightweight so expect longer scan times for your restore points, especially with large mailboxes and/or a lot of local files. Think about servers that hold multiple user's OST files. If performance is critical or PST files aren’t a priority, setthis key to `0` to disable email scanning.  

My personal view:
 

Use this key situationally! Enable it for targeted Secure Restores of mail data, but disable it for broad backup scans where non-email files are the focus.  


VTHScanExclusions: Your Performance Safeguard 

  • Key Path: HKLM\SOFTWARE\Veeam\Veeam Threat Hunter\  
  • Value Type: REG_MULTI_SZ (Multi-String)  


This key is Threat Hunter’s "exclusion list" a wildcard-driven filter to skip non-essential paths. Every second counts during malware scans, and excluding bloated folders (like temporary files or archives) can slash scan times dramatically.  

How to use this exception list ?

One Path Per Line: List exclusions vertically—no commas, no quotes.  
Wildcards Are Your Friend (But Handle With Care):  

  •   *.log → Matches any ".log" file in any directory.  
  •   Backup* → Skips folders and files starting with "Backup" (e.g., `C:\Backup_Old\`).  
  •   \Projects\Temp\* → Ignores everything in "\Projects\Temp\" (but not subfolders like "\Projects\Temp\Archive\").  

Good to know: 

Veeam auto-prepends `*\` to your entry. 

                            "Documents*" becomes `*\Documents*` so matching any folder named "Documents".

Drive letters are wildcarded: 

                            "C:\Logs\*"  becomes "*\Logs\*"  

Minimum 3 characters per entry are needed

Deep path example: "\demo1*\demo2*\*" excludes "\demo123\demo\demo456\application.exe"

So pay attention when using wildcard in the middle of an exclusion string.  

A Real-World Example: 


Registry entry: 

*.tmp
Temp*
\Archive\*
Windows\Logs\*.bak

  
This set of exclusions will skip temporary files, "Temp"-prefixed items, anything in `\Archive`, and `.bak` logs under the path "Windows\Logs".  

Why This Matters: 

Veeam Threat Hunter isn’t just another scanner, it’s an insurance against "silent backup corruption". 

By leveraging these keys:  

  • You avoid scanning gigs of irrelevant email data (VTHScanEmail).  
  • You sidestep performance-killing directories (VTHScanExclusions).    
  • You gain enterprise-grade threat detection without buying new tools.  

Final Checklist:  
 

  • Back up your registry before editing.  (of course we always do !) 
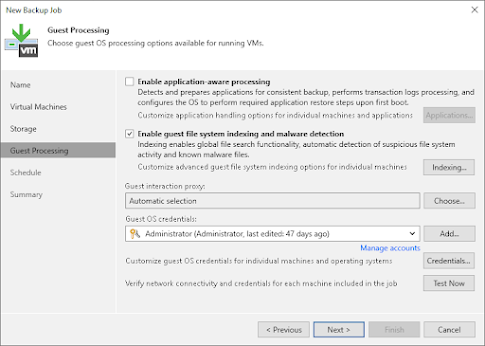
  • Guest file indexing must be enabled in order to scan the individual files.

  • Use Veeam ONE to monitor scan performance trends.  
  • Combine keys: Disable email scans (`VTHScanEmail=0`) & exclude non-critical paths for max speed.  
  • Explore Veeam’s Official Threat Hunter Guide for more information


Sunday, June 1, 2025

REGKEY of the month: JUNE

Hi, here we are again with our second episode of a total of 12, interesting regkeys for Veeam products.

This month we'll zoom in into the BackupCopyMirrorAll key...

Veeam Backup & Replication's Backup Copy jobs have two modes: Immediate copy (continuous) and Periodic copy (scheduled). By default, an immediate-mode backup copy job on its first run will only process the latest backup chain, not the entire history. In practice this means if your primary backup repository has older full/incremental chains (e.g. earlier monthly or yearly archives), those older restore points are skipped. In other words, the initial synchronization only grabs the newest full backup and its increments, leaving all previous chains behind. This behavior is documented by Veeam: "Backup copy job in the immediate copy mode processes only the latest backup file chain"helpcenter.veeam.com.

If you need to replicate the entire backup history for a job (for example, seeding an offsite repository or creating a full clone of past backups), this default behavior is a limitation. You would normally have to manually copy files or run complex scripts to migrate older points.

But with the BackupCopyMirrorAll you can do this in an automatic way.

Veeam provides a hidden registry setting named BackupCopyMirrorAll to override this limitation. When enabled for a given backup copy job, the job's first run will "mirror" all existing restore points from the source repository. Technically, this key forces the job to include every restore point in its initial sync instead of only the latest one

The registry key must be created on the backup server's registry (not on each repository).

Its details are:

  • Registry Path: HKEY_LOCAL_MACHINE\SOFTWARE\Veeam\Veeam Backup and Replication

  • Value Name: BackupCopyMirrorAll

  • Value Type: REG_MULTI_SZ (Multi-String Value)

  • Value Data: A list of backup copy job names (one per line) that should use full-chain mirroring.

Each entry in the multi-string value must exactly match the display name of a Backup Copy Job (including spaces and case). For example, if your jobs are named "Daily Offsite Copy" and "Monthly Archive Copy", the data should contain those names (each as a separate line). Crucially, this registry value must exist before you run the copy jobs for the first time - otherwise the older restore points will not be picked up.

Configuring the BackupCopyMirrorAll Key

To enable full-chain copying, create or update the registry value. For example, using PowerShell (run as Administrator) on the Veeam backup server:

# Example: Enable full-chain mirroring for two backup copy jobs

            $jobs = @("Daily Offsite Copy","Monthly Archive Copy")  

            New-ItemProperty -Path "HKLM:\SOFTWARE\Veeam\Veeam Backup and Replication" 

            -Name "BackupCopyMirrorAll" -PropertyType MultiString -Value $jobs

This creates a REG_MULTI_SZ value under HKLM:\SOFTWARE\Veeam\Veeam Backup and Replication named BackupCopyMirrorAll and populates it with the specified job names. You can verify it with:

            Get-ItemProperty -Path "HKLM:\SOFTWARE\Veeam\Veeam Backup and Replication" 

            -Name BackupCopyMirrorAll

Alternatively, you can add the value using regedit or reg add, but PowerShell is often easier for multi-string data.

How the this key affects backup copy behavior

With BackupCopyMirrorAll in place, the backup copy job's logic is altered. On the first synchronization run, instead of grabbing just the newest chain, the job enumerates all restore points in the source repository. It essentially processes each existing restore point as if it were "new". In practice, the copy job reads each restore point and creates a new, independent backup chain on the target repository.

This mirroring does not simply copy files byte-for-byte; it rebuilds a valid Veeam backup chain. For example, if the copy job is in Mirror mode, each original full backup in the source will be turned into an incremental backup on the target chain. The end result is that the target repository ends up with a continuous chain containing all the data from the source history.

Important:

Once the data is copied, the backup copy job enforces its own retention policy on the new chain. It does not inherit the source job's GFS (Grandfather-Father-Son) flags or retention settings. In other words, any weekly or monthly flags on the original backups will not automatically appear on the copied backups. Only the copy job's configured retention (including any GFS schedules you set on the copy job) will apply. Therefore, after the mirror operation, ensure the copy job's retention/GFS configuration is set appropriately. Otherwise, Veeam may prune older points from the target chain during its next retention run.

Use Cases and Operational Benefits

Enabling BackupCopyMirrorAll is particularly useful in scenarios where you need a complete backup history on a secondary location:

  • Offsite or Cloud Seeding: When introducing a new offsite repository or cloud archive, you often want all existing backups transferred without manual copying. With this key, an immediate-mode copy job will seed the offsite store with the full backup chain in one synchronization, saving time and effort.

  • Compliance/Retention Requirements: For regulatory compliance, you may be required to retain a certain history of backups offsite. By mirroring all restore points to a copy job, you can ensure those historical points are preserved. You can then rely on the copy job's own GFS schedule to keep, say, one full per month/year, knowing that the source's older backups were captured.

  • Dev/Test Environments: Developers or testers often need a full production dataset. Using this registry key, you can copy the entire backup chain to a separate test repository. This provides a complete set of restore points for rapid restore or data seeding, without interfering with production jobs.

  • Repository Migration: If you're migrating backups to a new storage system or upgrading the repository (e.g. moving to faster storage), a backup copy job with this setting can move the entire chain seamlessly. This avoids manual file transfers and ensures the chain is rebuilt correctly in the new location.

  • Retention Considerations: Whenever using this key, remember that the copy job's retention still applies. For example, if the copy job is configured to keep only 2 fulls, after copying the whole chain it will later prune older fulls as needed. Configure the copy job's retention (including any GFS policy) before running it so that required historical points aren't removed unexpectedly.

In each of these scenarios, the BackupCopyMirrorAll key automates what would otherwise be a labor-intensive process of replicating every backup point. By preparing the registry value in advance, your immediate-mode copy jobs will effectively "mirror" the entire source history to the target repository.

Monday, April 28, 2025

REGKEY of the month: MAY

I’ll be sharing interesting and handy Windows Registry keys related to Veeam products. Whether it’s a hidden tweak, a performance optimization, or a useful troubleshooting tip, each month will bring a new Registry key that can help you get the most out of your Veeam environment.

Stay tuned for more keys, it might just save you some time or solve a tricky issue!

Got a Registry key you’d like to see featured? Let me know !


Unmount SureBackup NFS datastores automatically.

We all have seen it. Inaccessible datastores. You immediately think somethings wrong, but after a second look you find out it's the NFS mount for your SureBackup. Nothing wrong there, but for some people quite annoying.


This is normal behavior, by default the datastore remains mounted. Why ? This saves time when mounting it again when you fire up the next vPowered task.

But leaving them can cause false alarms, misinterpretation on capacity planning calculations (eg. VeeamOne reports) since these datastores are seen as disconnected.

But as from VBR version 12.3.1 you can get rid of these inaccessible datastores with a red sign using a regkey.

To unmount SureBackup NFS datastores automatically, us the following registry keys.

The first key is to enable the automatic unmount

vPowerNFSUnmountDatastore (DWORD)

            Key Location: HKLM\SOFTWARE\Veeam\Veeam Backup and Replication\
            Value Name: vPowerNFSUnmountDatastore
            Value Type: DWORD (32-bit) Value
            Value Data: 1


The second key defines a timeout in minutes to perform the unmount.

vPowerNFSUnmountDatastoreRetryTimeoutMinutes (DWORD)

            Key Location: HKLM\SOFTWARE\Veeam\Veeam Backup and Replication\
            Value Name: vPowerNFSUnmountDatastoreRetryTimeoutMinutes
            Value Type: DWORD (32-bit) Value
            Value Data: 5 (example)


Fun fact:

Internally within Veeam, this is called 'The Hannes Feature" named to Hannes Kasparick, part of the Veeam product management and an advocate to implement this feature.

Monday, February 17, 2025

Instant recipe for Veeam Backup for M365 Linux Proxies

Introduction

Now that since version 8 of Veeam Backup for Microsoft 365 you can use Proxy pools to distribute the load over different proxies and where the backup itself will determine depending on the load of each proxy node separately where it will assign the next task already, setting up and adding proxies in a simple way is necessary.

With the “recipe” below you can quickly and easily prepare a Linux machine to install the proxy role on and then add it to a proxy pool.

What is a Veeam Backup for Microsoft 365 proxy ?

A Veeam Backup for Microsoft 365 v8 proxy is a component that acts as an intermediary between the backup infrastructure and Microsoft 365 services, facilitating efficient data transfer and reducing the load on the production environment. It handles tasks such as retrieving data from Microsoft 365 (e.g., Exchange Online, SharePoint, OneDrive), compressing and deduplicating it, and then forwarding it to the backup repository. By offloading processing tasks from the backup server, the proxy improves performance, scalability, and reliability, especially in large-scale deployments or environments with high data volumes. It can be deployed on-premises or in the cloud, depending on the organization's requirements.

What is a Veeam Backup for Microsoft 365 proxy Pool ?

A Veeam Backup for Microsoft 365 v8 Proxy Pool is a collection of multiple proxy servers grouped together to distribute the workload of backing up Microsoft 365 data (e.g., Exchange Online, SharePoint, OneDrive) more efficiently. By leveraging a pool of proxies, the backup process can scale horizontally, improving performance and reducing the time required for data retrieval and transfer. The proxy pool automatically balances tasks across available proxies, ensuring optimal resource utilization and high availability. This setup is particularly beneficial in large environments with high data volumes or when multiple backup jobs run concurrently, as it enhances throughput and minimizes the risk of bottlenecks.

Ingredients for our instant Linux proxy recipe

  • At least one, but preferrably more linux machines with a supported operating system.

    We use a supported Linux distribution because it requires no additional paying licenses and is easy to maintain with a minimal footprint.

  • Sufficient bandwidth (add as needed)

    The proxy role is the datamover so a high bandwidth connection to either the Microsoft environmentand the attached storage (Object storage) is needed.

  • SSH access to the linux machine

Preparation method

Connect to the Linux machine via SSH

To make things a little easier for us, we will install the ping utitliy if it is not already present. This will make it easier for us later to perform some connectivity tests from this machine. You can start from a minimal installation.

sudo apt-get install inetutils-ping 

You can always edit files with VI, but it's a little easier with nano, so we'll add that as well.  

sudo apt-get install nano 

The Microsoft .Net runtime must be installed from the Microsoft repository. Indeed, this is one of the prerequisites for a successful installation. When deploying the proxy role, this will be checked. Therefore, we must first add the Microsoft repo.

As a sleight of hand, we first retrieve the OS version in a variable:

 
# Get OS version info en fill variable $id en $version
source /etc/os-release
 

Next, we pull in the appropriate repository:

 
# Download Microsoft signing key and repository
wget https://packages.microsoft.com/config/$ID/$VERSION_ID/packages-microsoft-prod.deb -O packages-microsoft-prod.deb

and install the repository....

# Install Microsoft signing key and repository
sudo dpkg -i packages-microsoft-prod.deb
 

We will keep our kitchen clean and delete our just downloaded file which we no longer need.

# Clean up
rm packages-microsoft-prod.deb

To know all the recent versions we need to update our repos.

# Update packages
sudo apt update
 

Now it's time to install our .net runtime from the correct repo.

# Install .Net
sudo apt install aspnetcore-runtime-8.0
sudo apt install dotnet-sdk-8.0

In our quick and easy recipe, we use a Veeam Backup for Microsoft 365 server that is stand-alone and does not have internal DNS services. So we fall back on the good old HOSTS file.

To do this, on the Veeam Backup for M365 server, we'll edit the HOSTS file under:

c:\windows\system32\drivers\etc\

We add the IP address and respective DNS name of each proxy time and check if it is resolved using a ping command.


Also in the other direction, the Veeam Backup for M365 server must be reachable by DNS name.

IMPORTANT: not only the proxies must be able to individually resolve the server, but the proxies must also be able to resolve each other.

If this fails, you will get random errors like the one below:

'Resource temporarily unavailable' 

SO IT IS EXTREMELY IMPORTANT THAT MUTUAL DNS RESOLVING BETWEEN PROXIES ALSO WORKS.


Editing the Ubunto hosts file is done via:

 cd /
cd etc
sudo nano hosts

Basically, everything is now ready to add the proxy via the Veeam Backup for M365 server, however, it performs some additional checks.

A classic error that may come up is:

Error: .NET (`dotnet-`) must be added to the blacklist to prevent unattended upgrades that could impact the availability of the Linux proxy.


This error is described at: https://www.veeam.com/kb4658

The solution for our Ubuntu-based proxy lies in setting up an exception so that this package is not upgraded automatically.

With the following command you can check if the package is on the exclusion list:

apt-config dump | grep 'Unattended-Upgrade::Package-Blacklist:: "dotnet-\?"'

If no results are shown, run the following command to add "dotnet-"; to the /etc/apt/apt.conf.d/50unattended-upgrades file.

sudo sed -i '/^Unattended-Upgrade::Package-Blacklist {/a\ "dotnet-";' /etc/apt/apt.conf.d/50unattended-upgrades

If we run our check back now you will see that the dotnet packages are now blacklisted.


Now everything is ready on the Linux machine to install the proxy role.
Adding a Linux proxy is a simple wizard that you run from the Veeam Backup for M365 server.

Running the Proxy Wizard

Step 1. Launch the New Backup Proxy Wizard

To launch the New Backup Proxy wizard, do the following:

  1. Open the Backup Infrastructure view.

  2. In the inventory pane, select the Backup Proxies node.

  3. Do one of the following:

  • On the Backup Proxy tab, click Add Proxy on the ribbon.

  • Right-click the Backup Proxies node and select Add backup proxy.


Step 2. Select Operating System Type

At this step of the wizard, select Linux to assign a role of the backup proxy server to a machine with Linux operating system installed. For more information, see the System Requirements.


Step 3. Specify Backup Proxy Server Address

At this step of the wizard, specify a computer that you want to use as a backup proxy server, its port number and optional description, this is the machine we've been preparing before.


  1. In the Host field, enter a DNS name or IP address of a computer that you want to use as a backup proxy server.

If the specified computer does not have a direct access to the internet, you can configure an internet proxy server for such a computer.

  1. In the Port field, enter a port number to access the specified computer.

  2. In the Description field, enter optional description.


Step 4. Specify SSH Connection Settings

In this step, enter a user account credentials to connect to the prepared machine and configure the SSH connection settings.

To configure the SSH connection settings, do the following:

  1. In the Account field, enter a user name.

  2. In the Password field, enter a password. The password is required in all cases except when you use a user with enabled NOPASSWD:ALL setting in /etc/sudoers.

  3. If you specified credentials for a non-root account that does not have root permissions on a Linux machine, click Advanced to grant the sudo rights to this account. For more information, see Configuring Advanced Settings.

  4. Select the Private key is required for this connection check box if you want to use the Identity / Pubkey authentication method. For more information, see Using Identity / Pubkey Authentication.

            Do the following:

    1. In the Private key field, enter a path to the private key or click Browse to select a private key.

    2. In the Passphrase field, specify a passphrase for the private key on the Veeam Backup for M365 server.

  1. In the SSH Port field, specify a number of the SSH port to connect to a Linux machine. By default, port 22 is used.

  2. In the SSH Timeout field, specify the SSH connection timeout. This timeout is used to wait for connection to the specified backup proxy server through SSH. The default value is 30000 milliseconds.


Step 5. Select Service Account

At this step of the wizard, specify an account that will be used to run Veeam Backup for Microsoft 365 Proxy Service on the proxy machine.

To do this, select one of the following options:

  • veeam365backup account. Select this option to use the default service account created by Veeam Backup for Microsoft 365.

  • Use the following account. Select this option to use an account that already exists. In the Account field, enter a user name.

Important: You must manually grant this account the required permissions in advance.

  • Create the following user account locally and assign the required permissions. Select this option to create a new account that Veeam Backup for Microsoft 365 will use as the service account. In the Account field, enter a user name.

Veeam Backup for Microsoft 365 will create a new service account and automatically grant the required permissions to this account.


 If all the provided information is correct, Veeam Backup for M365 will connect to the designated machine over SSH and make the necessary installations and registrations and start the proxy role. As from them you can add this proxy to a new or existing pool to optimize load balancing and scale-out.

Icing on the cake

A useful tool to view the load on the network interface when the proxy is in use is to use iftop. Install and run the tool as follows:

# install iftop to monitor interface load

sudo apt install iftop
sudo iftop